


The router node
Mastering the Router Node in Gumloop
When building automations, you often need different actions to run depending on the situation. That’s exactly where the Router node comes in. Think of it as a traffic controller for your workflows — it looks at your data, checks conditions, and decides which path to send it down.
Why Use a Router Node?
Without a Router node, you’d need separate automations for each possible scenario. With it, you can handle branching logic in one flow. This keeps things cleaner, easier to maintain, and far more flexible.
Some common use cases:
- Customer Support: Direct tickets to different Slack channels based on priority.
- Sales: Route new leads to different reps depending on region or deal size.
- Marketing: Send contacts into different nurture sequences depending on how they engaged with your last campaign.
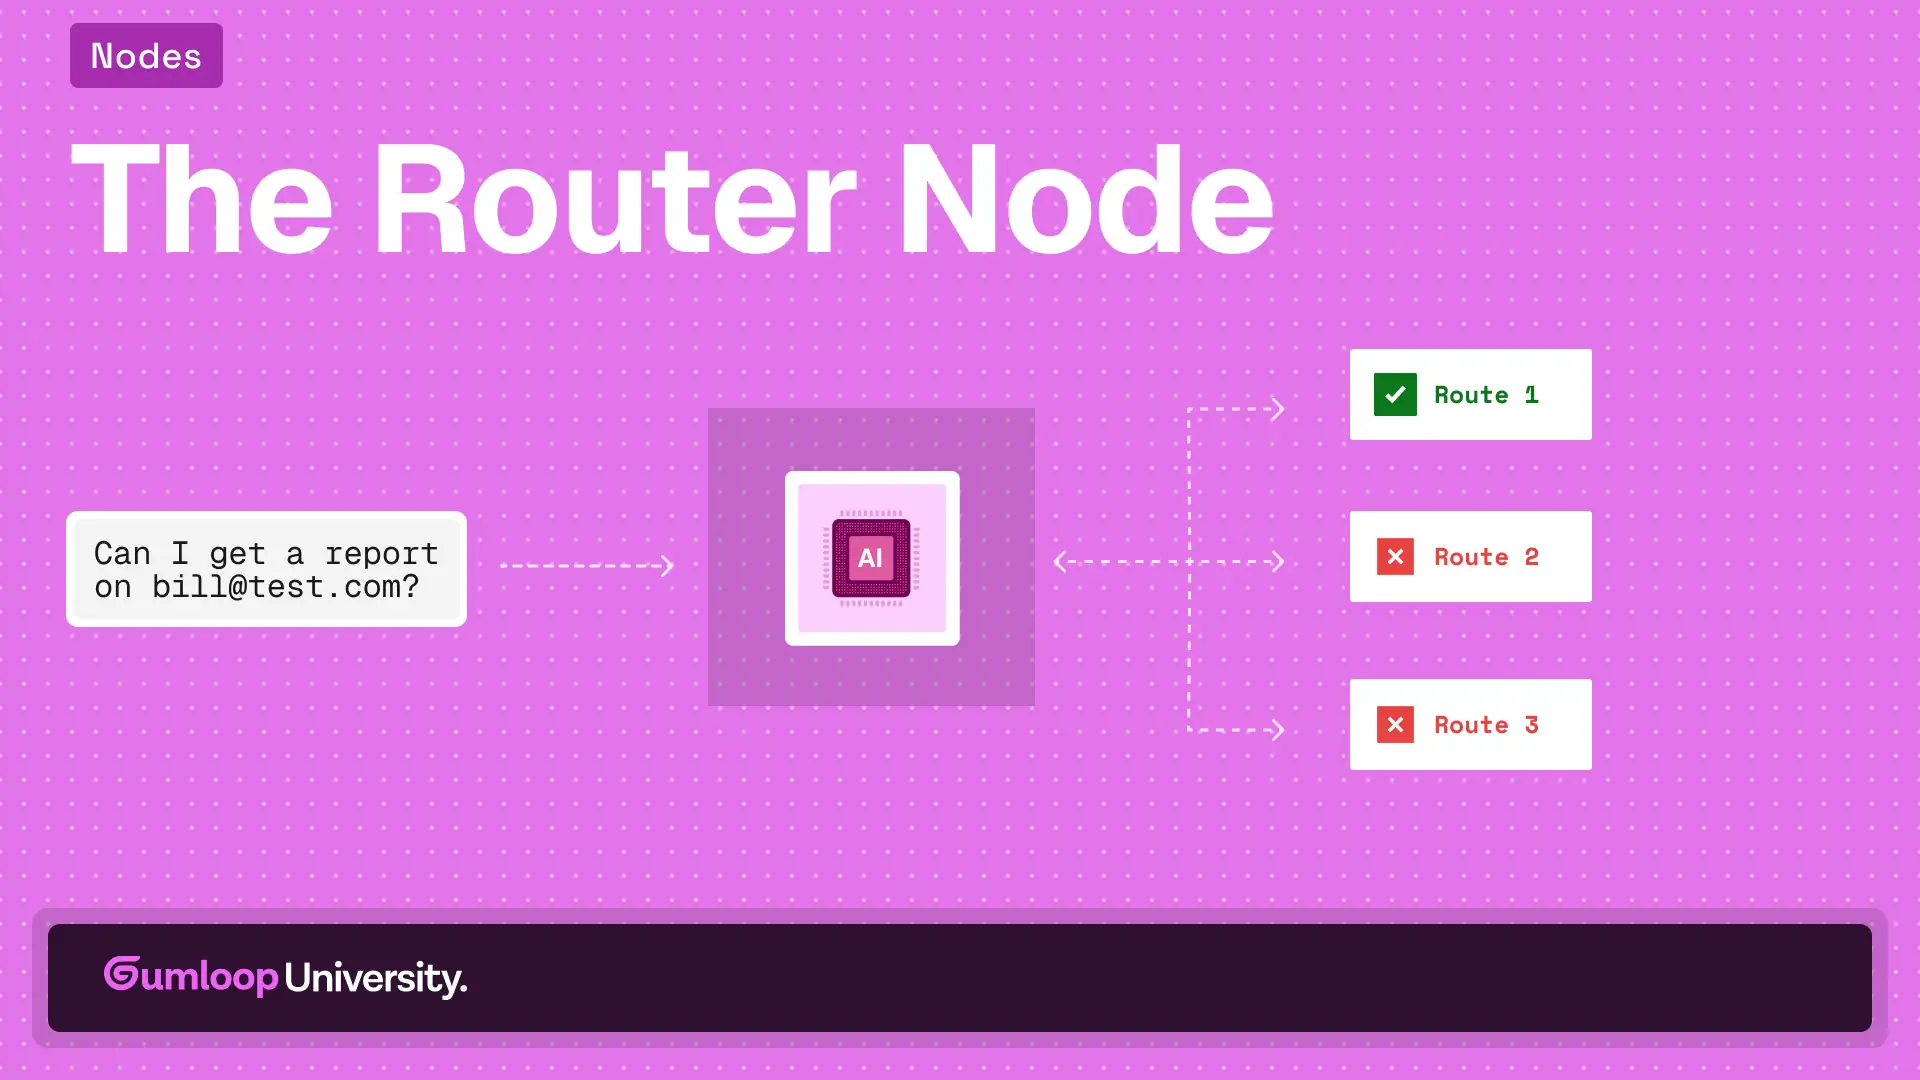
In the video above, we explore this through a Slack example: routing incoming messages to either generate a report, ask for missing details, or ignore chatter.
How It Works
Inside the Router node, you set up rules. Each rule has a condition (e.g., “if lead score is greater than 80”) and a path (what happens when that condition is met). Gumloop checks each condition in order and executes the matching branch.
In our Slack example, we defined three routes:
- Report request with email → generate the report.
- Report request without email → reply asking for an email.
- No report request → do nothing.
This makes the automation dynamic — instead of one-size-fits-all, it adapts in real time to the data coming in.
AI Mode vs. Non-AI Mode
The Router node can be configured in two ways:
- AI Mode: Write conditions in plain language, e.g., “User is asking for a report and the message contains an email.” Gumloop interprets and applies this logic. This is especially helpful for unstructured data, like messages or notes.
- Non-AI Mode: Build rules manually using operators like equals, greater than, contains. Perfect when working with structured fields such as numbers, regions, or tags.
In the Slack example, AI mode let us easily distinguish between a casual message and a report request. Non-AI mode would shine if we were, say, routing messages based on length or filtering by a specific keyword.
Best Practices
- Order matters: Routes are checked top to bottom, so put your most specific conditions first.
- Add a fallback: Always include a default route to catch unexpected cases.
- Test often: Run through sample data to confirm each branch behaves as expected.
Putting It All Together
The Router node lets you design automations that are smarter, cleaner, and more adaptive. Whether you’re routing Slack messages, customer requests, or lead data, it helps ensure the right action always happens.
And the best part? You don’t need to choose between technical precision and natural language — with AI and non-AI modes, you can use whichever approach fits your data best.
